The Definitive Guide to Improving Site Speed for Higher SEO
- Logan McFarland
- Jul 26, 2023
- 32 min read

Updated: Nov 7, 2023
Table of Contents
c. 8 Free CDN's
With site speed being a ranking factor in Google's algorithm, page load times can significantly impact your website's SEO performance. Research shows that even minimal delays in page loads lead to substantial increases in bounce rates. In 2023, having a fast website will be more crucial than ever for your website to rank competitively.
In this complete guide, we’ll explore crucial optimization techniques to accelerate your website and enhance your SEO through improved site speed.
Why Site Speed Matters for SEO

Quicker page load times directly impact search engine crawlability and indexation. The faster Googlebot can crawl your site, the fresher your content appears in the index. Slow sites often get crawled less frequently, leading to outdated indexed content.
Further, site speed significantly influences user experience metrics, which are SEO ranking factors. Faster pages equal:
- Lower bounce rates
- Longer time on site
- More pages viewed per visit
- Higher conversion rates
Google has specifically stated page speed correlates with rankings. Per their research, the likelihood of 4+ second delays in load times drove 20%+ more searches to a competitor site.
8 Essential Steps to Optimize Page Speed
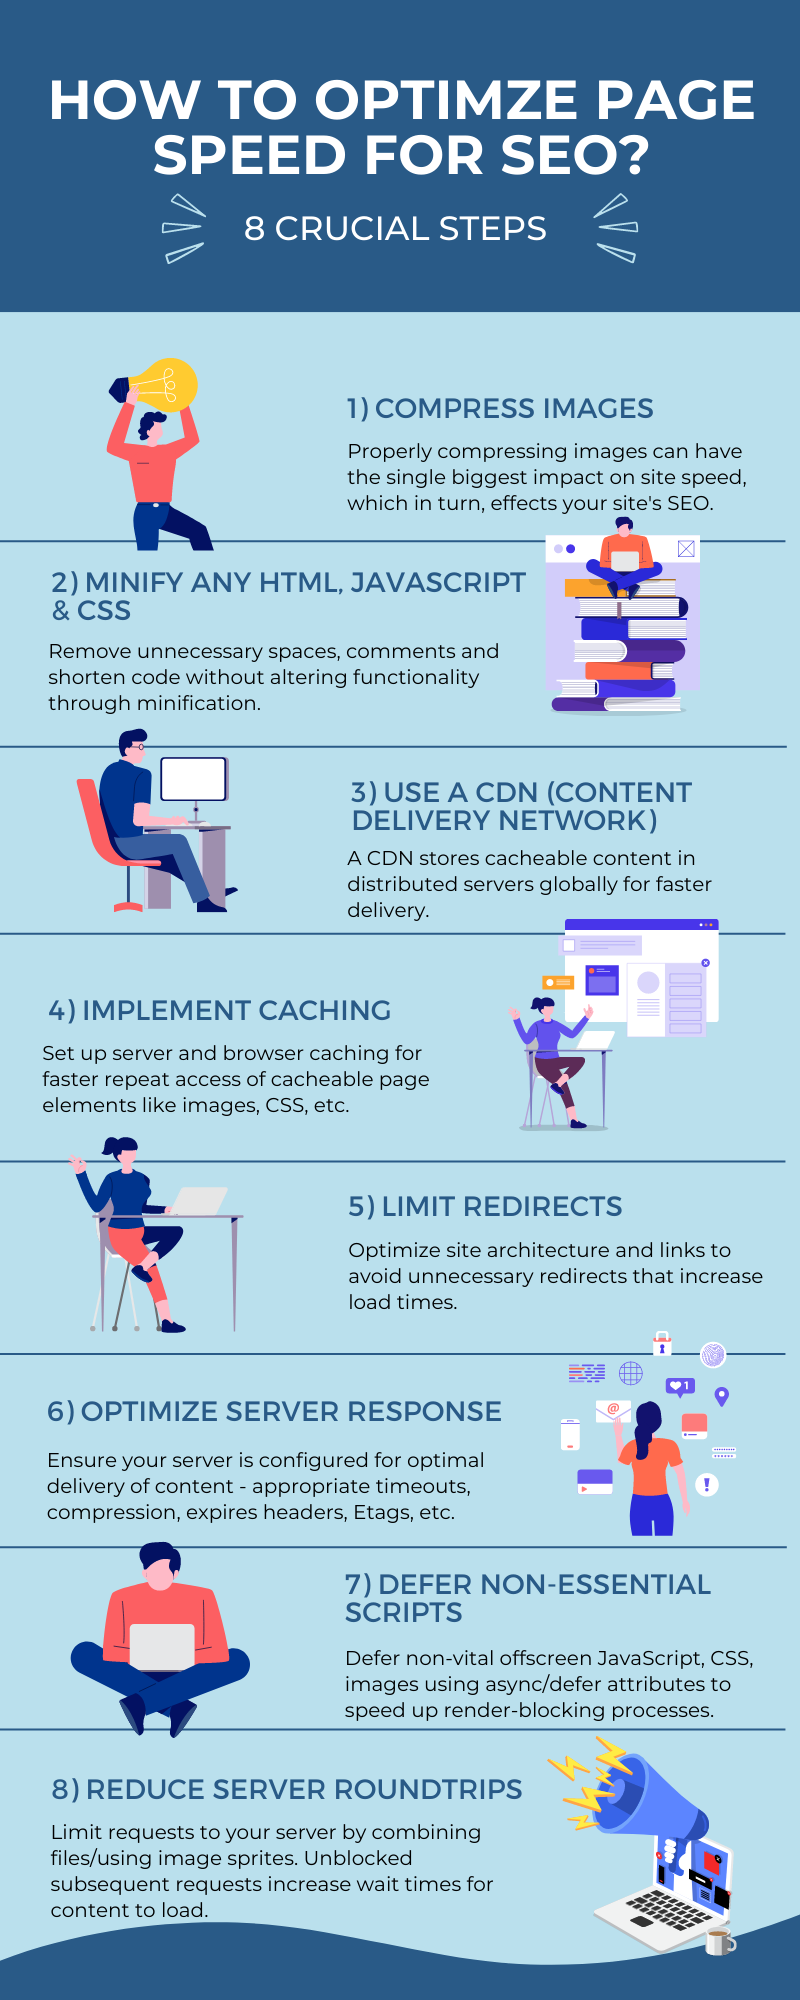
Here are 8 key technical areas to analyze and optimize to dramatically reduce load times:
1. Compress Images to Optimize Page Load Times
Images often make up the largest portion of page size, so properly compressing images can have the single biggest impact on site speed.
Here are some best practices on how to optimize your image sizes:
Use Next-Gen Formats: Convert images like JPEGs and PNGs to modern lightweight formats like WebP and AVIF. These compress files much smaller without perceptible quality loss.
Optimize Dimensions: Scale down image dimensions to the lowest acceptable size that matches their display size. Overly large images unnecessarily slow down pages.
Reduce Color Depth: Convert true color images to indexed color modes with fewer colors like 8-bit or 4-bit for PNGs. This significantly reduces file size.
Use Effective Compression: Save images with 85%+ quality instead of 100%. Also use tools like TinyPNG that apply smart compression techniques.
Strip Metadata: Remove all unnecessary EXIF, XMP, ICC tags to reduce overhead without affecting visual quality.
Implement Lazy Loading: Load only images visible in the viewport initially. Delay loading of below-the-fold images until user scrolls down.
Load Responsive Images: Use srcset and sizes attributes to serve appropriately sized images for each device. Avoid serving overly large images on mobile.
Leverage CDNs: Serve images from a content delivery network using cacheable image URLs for faster delivery across regions.
Enable Caching: Set far future Cache-Control headers for cacheable static images so browsers reuse them.

Following these best practices for image optimization can help reduce image payload size from 1MB to 100KB in many cases. Given that images impact load times the most, it's essential to focus heavily on image compression.
Here are 10 excellent free tools to help compress and optimize images for faster page load times:
1. TinyPNG - Compresses PNG and JPEG files by applying smart lossy compression techniques. Offers both online and desktop apps.
2. Squoosh - Open source image compression web app using modern codecs like MozJPEG, WebP and AVIF.
3. ImageOptim - Mac and Windows utility to optimize images and remove bloat. Supports popular image formats.
4. RIOT - Desktop application for Radical Image Optimization using optimization algorithms and metadata stripping.
5. Kraken.io - Robust API and web interface to compress JPG and PNG files. Offers free tier.
6. Optimizilla - Simple online tool to optimize and compress JPG and PNG files. Just drag and drop images.
7. Compressor.io - Intuitive web interface for compressing JPG and PNG files with custom optimization settings.
8. Image Compressor - Browser extension to compress images directly on the web page for saving bandwidth.
9. PurgeCSS - Remove unused CSS rules from stylesheets for faster rendering. Provides web app and CLI.
10. CSS Optimizer - Online tool to minify CSS files by removing comments, whitespace and optional characters.
These free tools can help significantly reduce image file sizes without much loss of perceivable quality. Compressing images should be the first priority for accelerating page speed.

Here are some specific examples of companies that compress images vs. those that don't:
Company that compresses images:
Amazon - Amazon optimizes all product images and photos on their site. They automatically compress images uploaded by sellers to save storage space and bandwidth. This helps their site load faster.
Company that doesn't compress images:
Small local businesses - Many small business websites don't optimize their images at all. They simply upload full resolution photos directly from their camera or smartphone. This leads to huge file sizes, slow load times, and a clunky site experience.
The companies that actively compress images tend to be savvy technology companies like Amazon, Google, Facebook etc. Small businesses and personal sites are more likely to overlook image optimization, resulting in a slower user experience. Proper image compression should be standard practice across all types of websites.
Does this mean you have to be as big as Amazon to know how to compress your images? Of course not! This guide should help you even if you are a small business with little resources.
The key for small businesses is working smarter by taking advantage of automation, careful prioritization and seeking targeted expert help when needed. Proper image optimization doesn't require a huge staff despite the competition.
2. Minify CSS, JavaScript and HTML

Remove unnecessary spaces, comments and shorten code without altering functionality through minification. Gzip compress files to further reduce size.
Minifying CSS:
- Removes unnecessary whitespace, newlines and comments
- Shortens class names and IDs to smaller strings
- Groups selectors together on one line
- Removes empty rules and unused CSS
This makes the file size smaller without changing the stylistic effects.
Example of Minifying CSS:
Original:
css
/* Header styles */

.header {
  width: 80%;
  margin: 0 auto;
  padding: 20px;
}

.header .logo {
  font-size: 24px;
}
Minified:
css
.header{width:80%;margin:0 auto;padding:20px}.header .logo{font-size:24px}
3 Free Tools You Can Use to Minify CSS:
- CSSNano (https://cssnano.co/) - Open source CSS minifier
- CSS Minifier (https://www.cleancss.com/css-minify/) - Online tool for minifying CSS
- YUI Compressor (http://yui.github.io/yuicompressor/) - Java-based compressor for CSS and JS
Minifying JavaScript:
- Removes whitespace, newlines and comments
- Renames variables and functions to shorter names
- Safely rewrites code patterns to take up less space
Doing this reduces the JS file size significantly while retaining functionality.
Example of Minifying Javascript:
Original:
js
// Calculate total price

function getTotal(price, tax) {
  const total = price + (price * tax);
  return total;
}
Minified:
js
function a(b,c){const d=b+(b*c);return d}
4 Free Tools You Can Use to Minify Javascript:
- UglifyJS (https://github.com/mishoo/UglifyJS) - NPM library for minifying JS
- JavaScript Minifier (https://javascript-minifier.com/) - Online JS minifier
- JShrink (https://github.com/tedious/JShrink) - Java-based JS minifier
- JSCompress (https://jscompress.com/) - Web-based JS minification
Minifying HTML:
- Removes whitespace and newlines
- Eliminates unnecessary attributes and closing tags
- Minifies CSS and JS embedded in HTML
Minified HTML loads faster while rendering identically. Most sites leverage plugins in CMSs or build processes vs. manual minification.
Example of Minifying HTML:
Original:
html
<button class="submit-button" id="submit">
  Submit Form
</button>
Minified:
html
<button class=submit-button id=submit>Submit Form</button>
3 Free Tools You Can Use to Minify HTML:
- HTML Minifier (https://www.willpeavy.com/tools/minifier/) - Online minifier for HTML
- Minify Code (https://minifycode.com/html-minifier/) - Web-based HTML minifier
- HTML Minifier (NPM module) - Can integrate into Node.js builds
As you can see, minification greatly reduces file size by removing whitespace, comments, unnecessary characters, and renaming symbols to shorter names without changing the visual output. The key benefit across CSS, JS and HTML is dramatically smaller files sizes without changing visual output. This equals faster page loads. Minification does require testing to avoid breaking site functionality.
3. Use a CDN (Content Delivery Network)
A content delivery network stores cacheable content in distributed servers globally for faster delivery. Configure CDNs for all static assets. A CDN is a network of distributed servers that provides cached assets and static file content to users from the server closest to them.

Using a CDN has several benefits including:
Improved performance - Resources are served from edge servers that are geographically closer to users. This speeds up asset load times.
Caching and availability - CDNs store cached copies of assets on servers around the world. This improves cache hit rates and ensures uptime.
Reduced server load - The origin server doesn't have to serve all requests directly, reducing bandwidth and freeing up processing.
DDoS resilience - Large CDNs can absorb and mitigate DDoS attacks better than a single origin server. To use a CDN, you would upload your static assets like images, CSS, JS files, videos etc to the CDN provider (e.g. Cloudflare, Cloudinary, Akamai). Then replace references to these assets on your site with the unique CDN URLs.
With those assets now being served from the CDN's servers instead of your own, you benefit from faster load times globally. You also save on hosting bandwidth costs. Popular CDNs for assets typically charge based on bandwidth usage.
The key is to identify static assets that can be cached at the CDN edge, and shift delivery of those assets to a globally distributed infrastructure optimized for speed. This is a key performance optimization.
So how would you as a small to medium size business leverage a CDN?
Here is a step-by-step process of how to use a CDN to improve website performance:
Step 1: Identify static assets
- JavaScript files (e.g. jQuery, bootstrap.js)
- CSS files (e.g. styles.css)
- Image files (e.g. header.jpg, product1.png)
- Videos, PDFs and other downloadable files
- Favicons, fonts and other auxiliary files
These are all examples of static, cacheable assets that can be served from a CDN.
Step 2: Choose a CDN provider
Popular options:
- Cloudflare
- AWS CloudFront
- Cloudinary
- Fastly
- Akamai
Evaluate features, pricing, and ease of use.
Step 3: Upload assets to CDN
Follow provider instructions to upload files to CDN storage. This may involve installing an app, using an API, or manually uploading.
Step 4: Update references
Replace existing asset links and paths with the new CDN URLs provided. Often this can be automated.
Step 5: Configure caching
Set proper cache headers (e.g. max-age) so assets are cached optimally at the edge. The CDN provider can assist with ideal configurations.
Step 6: Monitor and optimize
Use performance monitoring to catch any issues. Tweak configurations and asset delivery as needed to improve speed

Don't want to have to pay for a CDN? Here are 8 Free CDN's:
1. Cloudflare - Offers a free plan for CDN services. Bandwidth limits apply depending on plan.
2. jsDelivr - Free open source CDN focused on JavaScript and npm packages. No bandwidth limits.
3. RawGit - Simple free CDN aimed at GitHub file hosting. Good for testing or low-traffic sites.
4. BootstrapCDN - CDN focused on hosting Bootstrap, jQuery and other libraries for free.
5. Unpkg - Provides free CDN hosting for files from npm and GitHub.
6. GitCDN - CDN built for open source libraries hosted on GitHub. Free tier available.
7. STATIC - Amazon S3 based free CDN by Segment. Easy to use with 100GB/month free.
8. PageCDN - Offers free website acceleration through their free CDN services.
These are some free CDN options available, though they often have more limited features compared to paid CDNs.
The tradeoff with free CDNs is often lower performance, bandwidth allowances, less configuration options, and lack of advanced caching features. However, they can be very useful for small sites, small businesses or if you just wanted to getting started with testing CDN benefits.
For more heavy duty production uses, paid CDNs like Cloudflare, AWS CloudFront, or Akamai tend to provide better performance, availability, management, and support.
Here are 4 bonus CDN's to checkout:
- cdnjs: https://cdnjs.com/
- JSDeliver: https://www.jsdelivr.com/
- Statically: https://statically.io/
- RsyncCDN: https://www.rsynccdn.com/
4. Implement Caching
Set up server and browser caching for faster repeat access of cacheable page elements like images, CSS, etc. Configure cache lifetimes carefully.

Here are 9 Types of Caching and Ways to Implement Caching to Improve Website Performance:
1. Browser Caching
Set cache control headers like "Cache-Control: max-age=3600" on static assets. This tells the browser to cache files locally for a specified time. Reduces requests.
Here is an example of using browser caching:
The web server sends response headers that tell the browser to cache static assets like CSS, JavaScript and images files:
# Cache images for 1 week
Cache-Control: max-age=604800

# Fingerprint assets to enable long term caching
main.css?version=1.2.3
The browser caches these static files locally. On the next page visit, the browser checks if the cached files are still valid. If so, it uses the local cached versions instead of making HTTP requests. The HTML document itself has no caching headers, so the browser always fetches the full HTML from the server.
This means the browser can load pages faster by reusing cached static assets, but still gets the latest HTML content. To handle updates, the server filenames include a version or fingerprint that changes when the file contents change. This invalidates the old cached file, forcing a refresh. Overall, proper browser caching improves performance and reduces server load by minimizing requests for reusable assets. The server controls caching with headers.
2. CDN Caching
Using a content delivery network caches assets globally. Set far future expires headers for optimal caching at edge locations.
Here is a specific example of using Cloudflare CDN caching:
1. You deploy a website www.example.com with images stored at www.example.com/images/
2. You sign up for Cloudflare and change your domain nameservers to Cloudflare's DNS.
3. In the Cloudflare dashboard, you enable the CDN and set caching rules for images to cache for 1 month.
4. Cloudflare caches a copy of www.example.com/images/logo.png on their CDN edge servers around the world.
5. A user in London requests www.example.com which fetches the HTML from your server.
6. The HTML references www.example.com/images/logo.png.
7. The user's browser finds the London Cloudflare edge server closest to them.
8. It requests logo.png from this London edge server cache instead of your origin server.
9. Cloudflare serves logo.png from the London cache within milliseconds.
10. You website loads faster for the user because Cloudflare's CDN cached and served the image file locally.
This way Cloudflare caches static resources globally and improves performance without any changes to your site. It's a simple way to leverage CDN caching.
3. Server-Side Caching
Cache database queries, API requests, computationally intensive operations on the server-side. Stores results in memory or Redis.
Here is an example of implementing server-side caching in Node.js:
js
// Set up cache
const NodeCache = require("node-cache");
const cache = new NodeCache();

// Sample API route handler
app.get("/api/users", (req, res) => {

  // Check if result is in cache
  const cachedUsers = cache.get("users");
  if (cachedUsers) {
    console.log("Serving from cache");
    return res.json(cachedUsers);
  }

  // If not in cache, get data from DB
  db.query("SELECT * FROM users", (err, results) => {
    if (err) throw err;

    // Add results to cache
    cache.set("users", results, 3600); // cache for 1 hour

    res.json(results);

  });

});
This checks the cache first and returns the cached data if it exists. Otherwise, it queries the database, stores the result in the cache, and returns the data.
Some key points:
- Node-cache module is used for in-memory caching - Cache key is "users" - can be any string - Cache time is set to 1 hour (3600 seconds) - Cache is checked before querying DB - DB results are stored in cache for next request
This avoids redundant DB queries and improves response time by using in-memory caching. The cache expires after 1 hour to keep data fresh.
4. Database Caching
Database query caching stores frequently used queries and results to return data faster. MySQL and Postgres have query caching capabilities.
Here is an example of implementing database query caching in MySQL to improve performance:
1. Enable the query cache in my.cnf (MySQL config file):
query_cache_type = ON
query_cache_size = 64M
This sets aside 64MB of memory for caching query results.
2. In MySQL, run queries with SQL_CACHE:
sql
SELECT SQL_CACHE * FROM users WHERE id = 1;
This caches the result of this query in the query cache.
3. On subsequent same queries, the result is served from the query cache instead of running the query again.
You can check if query results came from the cache by running:
sql
SHOW STATUS LIKE 'Qcache_hits';
This shows the number of cache hits.
Some key points:
- Query cache stores text of query and result - Only caches full exact match queries - Cache needs to be invalidated if tables are modified - Settings control cache size and usage
Enabling the MySQL query cache is an easy way to significantly improve performance for repetitive queries. The cache is checked before running queries each time.
5. Object Caching
Store frequently accessed objects in memory using a cache like Memcached or Redis. Faster lookup than database.
Here is an example of implementing object caching in Python using the memcache library:
python
import memcache

# connect to memcached server
cache = memcache.Client(['127.0.0.1:11211'])

# simple User class
class User:
    def __init__(self, id, name):
        self.id = id
        self.name = name

# create a user object
user = User(1, 'John')

# serialize object
serialized_user = pickle.dumps(user)

# save to cache
cache.set('user_1', serialized_user)

# retrieve from cache
serialized_user = cache.get('user_1')

# deserialize
user = pickle.loads(serialized_user)

print(user.name) # prints "John"
The key steps are:
- Connect to a memcached server instance - Serialize the object using pickle - Save the serialized object to cache with a key - Retrieve the serialized object - Deserialize to get back the original object
Some benefits are:
- Retrieving objects from a cache is faster than reconstructing them or fetching them from a database. This reduces application response times.
Cached objects can be efficiently shared across multiple applications and servers.- Flexibility - A variety of caching libraries and servers make object caching easy to implement.- Resilience - If downstream services fail, the application can still serve cached data.
This allows caching complex Python objects in memcached for fast lookup later, instead of reconstructing or fetching them from a database.
6. Full Page Caching
Cache full rendered pages by storing the HTML. Allows serving pages directly from cache.
Here is an example of implementing full page caching using the cache_page decorator in the Django Python framework:
python
from django.views.decorators.cache import cache_page

@cache_page(60 * 15)
def my_view(request):
  # ... complex logic to generate response
  return render(request, 'my_template.html', {
    'data': 123
  })
This caches the full HTML output of my_view for 15 minutes (60 * 15 seconds).On the first request, my_view will execute normally and cache the response. On subsequent requests until the cache expires, the cached HTML is returned instead of rerunning the view logic.
To implement in express.js:
js
const cache = require('express-cache-controller');

app.get('/page', cache.cacheResponse(15 * 60), (req, res) => {
  // generate page content
  res.render('page', {data: 123});
})
This will cache the rendered page for 15 minutes.
The key steps are:
- Decorate route handler with cache middleware - Cache time is specified in seconds - Full generated HTML response is cached - Subsequent requests return cached HTML
This avoids unnecessary execution of complex view logic and database queries to regenerate identical content. Full page caching is great for public pages or content that rarely changes.
7. Edge Caching
Use a reverse proxy cache like Varnish to cache pages at the edge nearer users. Takes load off application servers.
Here is an example of implementing edge caching using Cloudflare as a CDN:
1. Upload your static assets (CSS, JS, images) to a CDN like Cloudflare.
2. In the Cloudflare dashboard, enable the "Caching" feature for your domain.
3. Set "Browser Cache Expiration" to 1 month for assets. Now static files will be cached at Cloudflare's edge locations for 1 month.
4. For dynamic content, you can use Page Rules to cache HTML pages:
http://www.example.com/about-us

Cache Expiration Status: Cached
Cache Expiration: 1 day
This caches the HTML for /about-us for 1 day at the edge.
Key steps:
- Upload static assets to CDN - Enable CDN caching with expiration times - Cache full pages for dynamic content via Page Rules
Benefits:
- Assets and pages are cached closer to users - Removes load from origin servers - Faster page load times for end users globally
Edge caching via a CDN is great for handling traffic spikes and reducing latency by caching content at points of presence near users. Popular CDNs like Cloudflare, Akamai, Fastly provide these caching services.
8. CDN Purging
Clear cached assets on CDNs when you update files. Ensure users get the latest files.
Here is an example of purging cached content from a CDN like Cloudflare:
1. Update a file on your origin server, such as main.css.
2. Purge the file from Cloudflare's cache using the API:
curl -X POST "https://api.cloudflare.com/client/v4/zones/{zone_id}/purge_cache" \
     -H "X-Auth-Email: user@example.com" \
     -H "X-Auth-Key: c2547eb745079dac9320b638f5e225cf483cc5cfdda41" \
     -H "Content-Type: application/json" \
     --data '{"files":["http://www.example.com/main.css"]}'
This purges main.css from Cloudflare's cache, forcing it to fetch the updated file from your origin on the next request.
3. You can also purge everything:
curl -X POST "https://api.cloudflare.com/client/v4/zones/{zone_id}/purge_cache" \
     -H "X-Auth-Email: user@example.com" \
     -H "X-Auth-Key: c2547eb745079dac9320b638f5e225cf483cc5cfdda41" \
     -H "Content-Type: application/json" \
     --data '{"purge_everything":true}'
This clears Cloudflare's entire cache for your site.
Key steps:
- Update files on origin server - Use Cloudflare API to purge specific files or everything - Cloudflare fetches new files again from origin
This ensures changes are immediately reflected to end users when using a CDN for caching. All major CDNs provide a "purge" API to clear cached content.
9. Redis Caching
Install Redis. In your application code, cache the results of database queries or API calls using Redis:
// Node.js example

const cache = require('redis').createClient();

function getUsers() {
  return cache.get('users') || db.queryUsers().then(users => {
    cache.set('users', users);
    return users;
  });
}
Proper caching at multiple levels - browser, CDN, server, database can significantly speed up performance by avoiding expensive operations and reducing latency. Caching takes load off application servers and databases.

Here are 11 Free Caching Tools to Improve Website Performance:
1. WP Rocket - Popular caching plugin for WordPress sites. Free basic version available.
2. W3 Total Cache - Robust caching and performance optimization plugin for WordPress. Free version.
3. LiteSpeed Cache - Lightweight WordPress caching from LiteSpeed web server company. Free for basic usage.
4. Swift Performance Lite - WordPress caching and optimization plugin with free components.
5. Cache Enabler - Simple and lightweight WordPress caching plugin to enable browser caching.
6. Comet Cache - Caching plugin for WordPress that compresses pages to enhance performance. Free version available.
7. Varnish - Open source HTTP cache. Requires hosting access to configure for websites.
8. Nginx Proxy Cache - Build in caching for the Nginx web server. Requires hosting access.
9. Redis - In-memory database that can be used for object caching. Free and open source.
10. Memcached - Free memory object caching system commonly used to cache database queries.
11. Cloudflare - CDN and caching service. The free tier provides basic caching.
5. Limit Redirects
Minimize HTTP redirects, especially long chains. Optimize site architecture and links to avoid unnecessary redirects that increase load times.

A limit redirect limits the number of times a URL can be redirected to prevent endless redirect loops.
For example:
- Site A redirects to Site B
- Site B redirects to Site C
- Site C redirects back to Site A
Without a limit, this would loop endlessly. To prevent this, servers can be configured to limit redirects, usually to something like 10. After 10 redirects, the loop would be detected and the final redirect would instead return an error or render an info page for the user.
Limit redirects help avoid:
- Endless redirect loops wasting server resources
- Errors or timeouts for users caught in loops
- Potential denial of service vulnerabilities
Common places to implement redirect limits:
- Web server configurations (Apache, Nginx)
- Application frameworks (Rails, Django, etc)
- CDNs and reverse proxies
- Load balancers
The redirect limit is usually exposed as a configurable setting. For example, Nginx's max_redirects setting. Setting a sane limit provides safety against loops. But it's high enough for normal redirects to work, like a login page redirecting to the app after auth. So in summary, limit redirects are a useful safeguard against endless redirect loops on modern websites and apps.
Here is a specific example of a redirect limit in action:
Let's say a website www.example.com has a Nginx server with max_redirects set to 5.
The site has these pages:
/page1 redirects to /page2
/page2 redirects to /page3
/page3 redirects to /page4
/page4 redirects to /page5
/page5 redirects to /page1
This forms a loop. So what happens when a user visits /page1?
1. User requests www.example.com/page1
2. /page1 redirects to /page2
3. /page2 redirects to /page3
4. /page3 redirects to /page4
5. /page4 redirects to /page5
6. /page5 redirects to /page1 (6th redirect, hits limit)
Instead of looping forever, on the 6th redirect, Nginx will stop and return a page with an error or information message. So the redirect limit catches the loop on the 6th redirect, avoiding an endless loop for the user. The user sees a relevant error or info page instead of a timeout or getting stuck. Configuring sane redirect limits prevents problems!
Here are 10 free tools that can help limit redirects:
1. Screaming Frog SEO Spider - This crawl tool allows you to crawl a site and see all redirects. You can then analyze and eliminate unnecessary redirects.
2. Google Search Console - The coverage report shows redirect chains. Review these to identify problematic redirects.
3. MozBar - This browser extension shows redirect paths for each page. Use it to spot redirect issues.
4. WooRank - The site auditor provides a redirect analysis to identify excessive redirects.
5. Redirect Path - This free tool visualizes redirect chains and loops for a website.
6. Redirect Detective - Browser extension that exposes redirect chains for pages you visit.
7. SEMrush - The site audit tool will identify redirect issues and chains. The free account has limited usage.
8. Ahrefs - Shows redirect chains for a site. The free account has limitations.
9. Screaming Frog Log File Analysis - Upload your site log file to see all redirect paths taken by users.
10. Chrome DevTools - The Network tab will show each redirect along with codes. Review to optimize.
The key is using a combination of crawl tools, link analyzers, and log file reviews to identify unnecessary, inefficient, and excessive redirects to improve site performance.
6. Optimize Server Response
Ensure your server is configured for optimal delivery of content - appropriate timeouts, compression, expires headers, ETags etc. Upgrade hosting if needed.

Here are 9 ways to optimize server response times:
1. Cache database queries, API calls and computationally intensive operations. Storing cached copies in memory avoids expensive regenerating.
2. Set up a reverse proxy cache like Varnish to cache full page outputs and serve cached pages for repeat requests.
3. Tune database queries to be more performant, using indexes, query optimization, caching, etc. Faster queries reduce server processing time.
4. Profile server side code to identify and optimize slow functions, expensive operations or bottlenecks.
5. Scale up server resources like RAM, CPU, network bandwidth to be able to handle higher loads and throughput.
6. Distribute load across multiple servers using load balancing and horizontal scaling.
7. Tune Linux kernel settings for high traffic servers, like increasing file handle limits.
8. Use asynchronous/non-blocking models for I/O bound tasks to increase throughput.
9. Offload resource intensive processes like media encoding to background workers.
So in summary, optimizing server response requires caching, distributed infrastructure, code profiling, database tuning, load balancing and benchmarking server limits. The goal is reducing compute cycles and data transfer time.
Here is a specific example of optimizing server response time:
Let's say you have an ecommerce site that shows product details pages. When a user loads a product page, the server:
- Queries the database to fetch the product details
- Resizes product images on the fly
- Makes API calls to fetch inventory and pricing
- Renders the full page to HTML
This makes the page slow to load.
Here are some optimizations:
- Add Redis caching to cache product data, avoiding the database query
- Use Cloudinary to resize images, offloading this from the server
- Cache API calls to inventory and pricing APIs in Redis
- Enable Nginx compression for HTML, CSS and JS
- Add a Varnish proxy cache to cache full page outputs
- Optimize the product query using an index on the product ID
- Scale up to a larger server size with more CPU and memory
With these changes, the page load time could improve significantly:
- The product data, images and APIs are cached
- The actual server processing is reduced
- The page output is cached by Varnish
- The database can find the product faster
So specific optimizations like focused caching, offloading, and scaling resources can improve server response time dramatically.
Here are 10 free tools that can help optimize server response times:
1. PageSpeed Insights - Analyzes pages and provides optimization suggestions focused on performance. By Google.
2. YSlow - Browser extension that grades web page performance and provides tuning advice. By Yahoo.
3. Apache JMeter - Open source load testing tool to stress test and benchmark server responses under load.
4. Siege - Command line HTTP load testing and benchmarking utility. Good for testing performance.
5. ngxtop - Real time metrics for Nginx server performance monitoring. Useful for tuning.
6. PostgreSQL Explain - Tool to analyze query plans and performance in PostgreSQL. Helps optimize queries.
7. Redis Benchmark - Tool to measure Redis server performance for different use cases.
8. Perf - Linux profiling tool for analyzing CPU and memory bottlenecks. Built-in.
9. Netdata - Real time performance monitoring and graphing for Linux systems. Easy to use.
10. Locust - Python based load testing framework for web apps. Allows scripting user loads.
7. Defer Non-Essential Scripts
Only load above-the-fold page content initially. Defer non-vital offscreen JavaScript, CSS, images using async/defer attributes to speed up render-blocking processes.

Deferring non-essential scripts is an optimization technique that can improve page load speed.
Benefits of Deferring Non-Essential Scripts:
- Non-essential scripts are scripts that are not critical to the initial rendering of the page. This may include analytics scripts, social media scripts, remarketing pixels, etc.
- By default, browsers download and execute scripts in the order they appear in the page. This can block rendering and delay page load.
- Using the defer attribute tells the browser to download the script, but delay executing it until after the initial page load.
- Deferring non-essential scripts allows the critical HTML, CSS, and key JavaScript to load first. This allows the page content to render more quickly.
- Deferred scripts are executed in order once the initial page load completes.
- To defer a script, add the defer attribute to the script tag:<script defer src="script.js"></script>
- Deferring scripts works well for things like analytics that don't need to execute immediately. It should not be used on scripts essential for above-the-fold content.
- Deferring scripts can also help avoid blocking the browser from parsing subsequent content on the page.
Deferring non-essential scripts optimizes page loading by prioritizing critical resources first and delaying non-essential scripts until after the initial render. This provides a faster loading experience for users.
Here is a specific example of deferring a non-essential script on a webpage:
html
<!DOCTYPE html>
<html>
<head>
  <title>Page Title</title>
</head>
<body>

  <!-- Critical CSS and JavaScript -->
  <link rel="stylesheet" href="styles.css">
  <script src="main.js"></script>

  <!-- Page content -->
  <h1>Page Title</h1>
  <p>Page content goes here...</p>

  <!-- Non-essential script -->
  <script defer src="analytics.js"></script>

</body>
</html>
In this example, the analytics.js script is deferred by adding the defer attribute to the script tag.
Some key points:
- The main.js script is not deferred since it contains essential JavaScript needed for the page rendering.
- The analytics.js script is deferred as it is not essential to the initial page load.
- By deferring analytics.js, it will not block the page load and will only run after the initial render.
- The deferred scripts are still executed in order after load. So analytics.js will run after main.js.
- This improves performance by prioritizing critical resources first. Non-essential scripts come later.
The defer attribute on the analytics script allows it to be delayed until after the important content has rendered. This is a simple and effective optimization technique.
Here are two specific examples comparing a website that defers non-essential scripts versus one that doesn't:
Website using defer:
Viewing the source, we can see they defer their Google Analytics script:
html
<script defer src="https://www.google-analytics.com/analytics.js"></script>
By deferring analytics, it prevents blocking page rendering.
Website not using defer:
In their source code, the Google Analytics script is not deferred:
html
<script src="https://www.google-analytics.com/analytics.js"></script>
This means analytics.js will load and execute immediately, potentially delaying the page load. In general, many sites do not defer their analytics and social scripts yet. Using defer on these non-essential scripts is an easy web performance win that more sites should utilize. Tools like PageSpeed Insights can identify non-deferred scripts. Testing with dev tools can reveal the rendering delay impact. Implementing defer helps prioritize the critical scripts and content first.
Not sure which scripts are critical and which ones to defer?

Here are 15 free tools that can help defer non-essential scripts on a website:
1. Google PageSpeed Insights - This free tool from Google analyzes pages and recommends deferring unused scripts. It helps identify optimization opportunities.
2. WebPageTest - Allows you to run page load tests and see visualizations of how deferred scripts impact render blocking. Helps validate improvements.
3. Chrome DevTools - The Network panel in Chrome DevTools shows you each script and when it loads/executes. Useful for diagnosing blocking scripts.
4. WP Rocket - WordPress caching plugin that has an option to automatically defer JS files containing analytics, social, etc. Makes optimization easy.
5. Autoptimize - WordPress plugin that can defer non-essential JS files. Also combines/minifies JS for faster loading.
6. Deferred Scripts - Simple WordPress plugin to manually defer scripts by name/path. Lightweight option.
7. Async JS Defer - Another WordPress plugin to selectively defer scripts by path or events like page load.
8. Defer JS - Small JavaScript library that makes it easy to programmatically defer scripts on the fly.
9. Rollup.js - JavaScript module bundler that can split code into smaller chunks to defer loading.
10. Webpack - Bundles assets and optimizes delivery, can defer JS not needed for initial render.
11. Parcel - Zero config web app bundler, can automatically split code to optimize performance.
12. SpeedCurve - Performance monitoring that helps find scripts to defer based on load waterfall.
13. PageSpeed Modules - Apache/Nginx modules for automatically deferring scripts based on PageSpeed Insights.
14. defer.js NPM package - NPM package version of the defer.js library mentioned previously.
15. script-defer - NPM module to programmatically defer scripts in Node.js apps.
8. Reduce Server Roundtrips
Limit requests to your server by combining files/using image sprites. Unblocked subsequent requests increase wait times for content to load.

Here are 12 specific examples of how to reduce server roundtrips:
1. Domain Sharding:
Break assets across multiple domains to allow more parallel downloads.
When a browser loads a web page, it normally downloads all the resources (CSS, JS, images etc) from a single domain. But browsers limit how many connections can be made to one domain at a time. So resources end up waiting in line to get downloaded one by one.
With domain sharding, the resources are split up and hosted across multiple domains. For example, instead of downloading everything from www.website.com, some resources are hosted on static1.website.com, others on static2.website.com, and so on. This allows the browser to download from multiple domains simultaneously.
Like opening multiple checkout counters at the store instead of having one long line. So resources that would have had to wait their turn in a long line can now be downloaded in parallel from different domains at the same time.
Overall, this results in faster page loading as multiple connections speed up resource downloads compared to a single serialized line. Domain sharding unblocks browser connection limits.
Here is an example of how domain sharding can be used to reduce roundtrips:
Say you have a page with 10 CSS and JavaScript files that need to be downloaded. By default, the browser will download these sequentially, waiting for each one to complete before moving to the next. This results in 10 roundtrips.
With domain sharding, you could split those assets across multiple domains like this:
Domain 1:
- style1.css
- script1.js
Domain 2:
- style2.css
- script2.js
Domain 3:
- style3.css
- script3.js
And so on across 5 domains. The browser can download assets from different domains simultaneously due to browser connection limits per domain. So now instead of 10 sequential roundtrips, you have 5 parallel roundtrips loading at the same time. This results in faster overall load time for these critical resources.
The key is to strategically split your assets across domains to maximize parallel downloads. Keeping the number of domains low to avoid DNS lookup overhead. Some common techniques include separating static assets from API domains and breaking up long cache-busted asset URLs into logical shards.
2. HTTP Keep-Alive:
Reuse TCP connections instead of opening new ones to reduce handshake overhead.
When you visit a website, your browser makes a "handshake" with the web server to request the HTML page. This is like your browser knocking on the server's door. Normally, the browser would close the door after getting just the HTML page. Then it would have to knock on the door again to request each additional resource like CSS, JavaScript, images.
Knock knock knock.
With Keep-Alive, after your browser gets the HTML, the door stays open. So your browser can just call out additional requests down the open doorway for the other files it needs. No need to knock repeatedly. This leaves the connection between your browser and the server open and ready for reuse. By reusing this open connection, Keep-Alive saves all the "handshaking" steps needed to start new connections.
It's like leaving your phone call connected after discussing one topic, instead of hanging up and dialing your friend again to discuss the next topic. Keep-Alive maintains one open connection for multiple requests rather than requiring separate connections.
This results in much faster loading of web pages, as your browser can grab all the resources it needs down one persistent connection instead of having to start from scratch each time.
Here is an example of using HTTP Keep-Alive to reduce roundtrips:
By default, HTTP uses a new TCP connection for each request/response cycle. This requires a complete TCP handshake and slow start for every resource downloaded. With Keep-Alive, the TCP connection can be reused for multiple requests rather than closing it after each one.
For example:
1. Browser opens a TCP connection and requests index.html
2. Server returns index.html
3. Instead of closing the connection, browser sends request for style.css over same connection
4. Server returns style.css
5. Browser requests script.js over same open connection
6. Server returns script.js
7. Connection is closed
This reduces the TCP handshake overhead and eliminates slow start for the 2nd and 3rd requests since an open connection is reused. To enable this, the server sends a Keep-Alive header signaling the connection should persist.
The client can make multiple requests over this open connection until it closes. Proper timeouts need to be configured so idle connections don't stay open too long. But Keep-Alive significantly reduces latency when multiple resources are downloaded from the same domain.
3. DNS Prefetching:
Resolve DNS earlier in the page load process to eliminate lookups.
Normally, when a browser needs to load a resource from a new domain, it first has to do a DNS lookup to translate the domain name to an IP address. This adds latency. With DNS prefetching, the browser proactively performs DNS lookups for domains it expects to need in the future.
For example, in the <head> of a page the developer could add: <link rel="dns-prefetch" href="https://cdn.example.com">. This tells the browser to go ahead and resolve cdn.example.com to an IP address in the background. Later when the browser needs to load scripts from that CDN domain, it already has the IP address cached and doesn't have to do the lookup. This eliminates DNS latency for subsequent requests. The domain has already been pre-resolved.
Browsers may also do predictive prefetching by looking at things like <link> tags and prefetching those domains. But explicit prefetching with <link rel="dns-prefetch"> gives more control. Overall this results in a faster and smoother page loading experience by preventing DNS lookups from delaying resource loads down the line. The DNS information is ready and waiting in the cache.
4. TCP Slow Start:
Optimize TCP slow start sequences to reduce latency.
5. Request Collapsing:
Detect duplicate in-flight requests and fulfill from a single response.
Request collapsing is a technique used by browsers to improve page load performance and reduce server load by combining multiple pending requests for the same domain into one single request. When a page initiates multiple requests, the browser will hold back sending additional requests and wait for the first response.
If multiple requests can be satisfied by one response, the browser will collapse those requests into one, only sending the initial request. This eliminates overhead from multiple requests and allows resources to be cached more efficiently.
Here is an example of request collapsing in action:Say a page needs to load 3 CSS files - style1.css, style2.css and style3.css from the same domain.Without collapsing, the browser would send 3 separate requests:
GET /style1.css
GET /style2.css
GET /style3.css
With request collapsing, the browser sends only the first request:
GET /style1.css
When the server responds with style1.css, the browser checks if the response can satisfy the other pending requests.If the server sends:
HTTP/1.1 200 OK
Content-Type: text/css

/* contents of style1.css */
/* contents of style2.css */
/* contents of style3.css */
The browser will collapse the 3 requests into 1, and cache the combined response to fulfill the remaining requests.This reduces the number of requests to just 1, saving on network overhead and latency. The server can efficiently combine resources in a single response.

6. Critical Path CSS:
Inline only the CSS needed for initial page load to unblock rendering.
Here is an example of using critical path CSS: Let's say we have a page with a large style.css file that contains all the CSS. This blocks rendering since the HTML won't render until the full CSS downloads.
With critical path CSS, we split the CSS into two files:
1. critical.css - Contains only the CSS needed to render the initial viewport. This is loaded in the <head>.
2. style.css - Contains the rest of the non-critical CSS. This is loaded asynchronously.
The HTML would look like:
html
<html>

<head>

<style>
/* critical CSS to render first view */
</style>

</head>

<body>

<div class="header">...</div>

<div class="content">...</div>

<script>
// Asynchronously load style.css after initial render
</script>

</body>

</html>
Now the page can render quickly with the critical CSS. The rest of the CSS loads asynchronously without blocking. This results in a faster first paint and content appearing sooner on the screen. Critical CSS unblocks rendering of the initial viewport.
7. Resource Hints:
Use preload/prefetch to prioritize downloads for key resources.
Resource hints allow web developers to provide the browser hints about resources that will be needed soon to improve page load performance. For example, we can hint that a stylesheet will be needed preemptively:
html
<link rel="preload" href="styles.css" as="style">
This tells the browser - hey, go ahead and start fetching styles.css now even if you don't need it yet.
We can also hint that an image will be needed soon:
html
<link rel="preload" href="hero-image.jpg" as="image">
And for fonts:
html
<link rel="preload" href="custom-font.woff2" as="font" type="font/woff2" crossorigin>
There are a number of resource hints like preload, preconnect, prefetch, and more.
By providing these hints in the HTML, we can kick off early resource loads before the browser itself realizes it needs those assets. This parallels resource loading and improves page speed. The browser takes care of caching and not actually using the resources until needed. But they load earlier!
8. Service Workers:
Cache assets and responses locally in the browser for instant loading.
A service worker is a script that runs separately in the background of a web browser and acts as a proxy for web pages that register it. It intercepts network requests, allowing developers to programmatically control caching, push notifications, background sync and other advanced features. Service workers enable web apps to provide functionality typically only available in native apps. By running independently, service workers don't block the loading of pages but can dramatically improve performance, offline capabilities and user experience.
Here is a simple example of using a service worker:
js
// Register the service worker
if('serviceWorker' in navigator) {
  navigator.serviceWorker.register('/sw.js')
    .then(function(registration) {
      console.log('Service worker registered!');
    })
}

// sw.js
const CACHE_NAME = 'my-cache';

// Install the service worker
self.addEventListener('install', e => {
  // Cache assets
  e.waitUntil(
    caches.open(CACHE_NAME)
      .then(cache => {
        return cache.addAll([
          '/css/style.css',
          '/js/main.js',
          '/images/logo.svg'
        ])
      })
  );
});

// Serve cached content
self.addEventListener('fetch', e => {
  e.respondWith(
    caches.match(e.request)
      .then(response => {
        return response || fetch(e.request);
      })
  );
});
This registers a service worker that caches key assets on install. It serves those cached assets first for faster performance. If the asset isn't cached, it falls back to the network. Service workers allow full programmatic control over caching, network requests, and other aspects of page loading.
9. Lazy Loading:
Defer non-critical resource loading until user interaction.
10. ETags:
Avoid sending full responses if resources are unchanged using ETags.
Here is an example of using ETags for cache validation:
ETags (entity tags) are HTTP response headers that allow web servers to indicate that content is cacheable. They are used for cache validation. When a browser requests a resource from a server:
1. The server response includes an ETag header with a unique value, like "x234dff":
HTTP/1.1 200 OK
ETag: "x234dff"
2. The browser caches the resource and saves the ETag.
3. Next time the browser requests this resource, it sends the saved ETag with the request:
GET /image.png
If-None-Match: "x234dff"
4. The server compares the ETag sent by the browser against the resource's current ETag.
5. If they match (the resource has not changed), the server sends a 304 Not Modified response, saving bandwidth.
6. If they don't match, the server sends a 200 OK response with the new resource and ETag.
This validation using ETags allows efficient caching and synchronization between browsers and servers. The unique ETag values are generated by the server based on the specific content.
11. Brotli Compression:
More efficient than gzip, Brotli Compression can further reduce payload sizes.
Brotli is a modern lossless compression algorithm developed by Google in 2015 that provides significantly better compression ratios than older algorithms like Gzip or Deflate. It compresses data by replacing repeated occurrences with references to a single copy. Brotli applies prediction and context modeling to further compress data.
It uses a multi-tiered compression approach for maximum efficiency. The compressed size is roughly 20-26% smaller than Gzip/Deflate while remaining fast to decompress. Brotli compression is well-suited for text, HTML, CSS, JS, fonts and images. It's supported by most modern browsers and implemented in many web servers.
Here is an example of using Brotli compression in a Node.js server:
js
const express = require('express');
const compression = require('compression');
const brotli = require('brotli');

const app = express();

// Compress responses using Brotli
app.use(compression({
  threshold: 0,
  filter: shouldCompress,
  brotli: {
    quality: 11
  }
}));

function shouldCompress(req, res) {
  if(req.headers['x-no-compression']) {
    // don't compress responses with this request header
    return false;
  }

  // fallback to standard filter function
  return compression.filter(req, res);
}

// Server your app
app.get('/', (req, res) => {
  res.send('Hello World!');
});

app.listen(3000, () => {
  console.log('Listening on port 3000');
});
Here are the main steps to enable and use Brotli compression:
1. Install the Brotli module in your Node.js server:
npm install brotli
2. Import and initialize the Brotli module:
js
const brotli = require('brotli');
3. Add Brotli middleware using a module like compression:
js
const compression = require('compression');

app.use(compression({
  threshold: 0,
  filter: () => true,
  brotli: {
    quality: 11
  }
}));
4. Set the "Accept-Encoding" request header to "br" to accept Brotli responses:
Accept-Encoding: br
5. Tweak the "quality" option from 1 to 11 (higher is better compression but slower).6. Ensure the client supports Brotli decoding on the browser/CDN.7. Consider compressing only textual content, not already compressed assets.
So in summary - install Brotli, enable compression middleware, set request header, adjust quality as needed, and ensure client-side support. Test to verify Brotli responses are properly compressed.
12. HTTP/3:
Built on UDP instead of TCP, optimized for low latency.
HTTP/3 is the latest version of the HTTP web protocol that uses QUIC as the underlying transport instead of TCP to provide faster, lower latency communication. Key benefits include 0-RTT connection establishment, reduced head-of-line blocking, and improved performance in poor network conditions.
HTTP/3 retains features like streams and push from HTTP/2 while introducing encryption by default through TLS 1.3. It is supported in modern browsers and brings major speed and security improvements to web communication. HTTP/3 is expected to eventually replace HTTP/2 as the dominant protocol powering the world wide web.
Here is a simple example to illustrate some HTTP/3 concepts:
Let's say a client makes a request to load a webpage:
GET /index.html HTTP/3
This initiates a QUIC connection to the server which establishes encryption parameters using TLS 1.3. The request and response headers are compressed using QPACK which is the HTTP/3 equivalent of HTTP/2 HPACK. The server sends back the HTML page along with CSS and JS resources using unidirectional streams:
:stream 1
html content

:stream 3
css content

:stream 5
js content
Streams allow multiplexing so resources can be sent as they become available, not head-of-line blocked. If the network drops a packet, QUIC recovers quickly without a TCP-like timeout.
The client can reuse the existing QUIC connection for subsequent requests to the same server instead of creating new TCP connections. Overall HTTP/3 provides significant performance gains over HTTP/2 and TLS 1.3 security by default.

Here are 10 free tools to help reduce server roundtrips and improve website performance:
1. Browser Caching - Set proper cache headers like Cache-Control and ETags to better leverage browser caching and avoid unnecessary re-downloads.
2. Resource Hints - Use hints like preconnect, prefetch, and preload to make the browser fetch assets early and parallelize downloads.
3. HTTP/2 - Support HTTP/2 on your server to enable request multiplexing and eliminate unnecessary roundtrips.
4. HTTP/3 - Leverage HTTP/3 with QUIC for faster page loads and 0-RTT resume of connections.
5. Minification - Minify HTML, CSS, JS to reduce payload sizes and speed up transfer. Use tools like html-minifier, clean-css, and UglifyJS.
6. Bundling - Concatenate multiple JS/CSS assets into bundles to reduce requests. Use Webpack, Rollup, Parcel etc.
7. Compression - Gzip compress textual content to shrink response payload size. Configure on the server.
8. Image Optimization - Use tools like ImageOptim, TinyPNG or Squoosh to optimize, resize and compress images.
9. Content Delivery Networks - Use a CDN like Cloudflare to cache assets nearer users and reduce roundtrips to origin servers.
10. Server Push - For HTTP/2 servers, use Link headers to push critical assets instead of waiting for browser requests.
The key is enabling caching, optimizing payloads, and parallelizing requests to avoid unnecessary roundtrips. These free tools can go a long way in improving web performance.
Measuring Speed Improvements
Use tools like Google PageSpeed Insights, Pingdom Website Speed Test, WebPageTest to measure improvements in metrics like:
- Page load times
- Time to First Byte
- First Contentful Paint
- Largest Contentful Paint
- First Input Delay
Compare speed tests before-and-after making changes. Target under 3 second load times on mobile and desktop. Monitor speed regularly to maintain optimization.
Conclusion: The Need for Speed

Users expect sites to load instantly. With prospects abandoning slow sites and Google prioritizing faster experiences, you simply cannot afford sluggish page speeds. Follow this site speed optimization checklist to lower bounce rates, boost conversions, and outrank competitors through vastly improved user experience and SEO.
In summary, website speed has become a critical factor for SEO and user experience. With page load times directly impacting metrics like user engagement, bounce rates, and conversions, it's imperative for websites to optimize site performance. This definitive guide outlined key web performance concepts and provided actionable tips to analyze and improve site speed.
By monitoring real user data, diagnosing performance bottlenecks, and leveraging various speed optimization techniques, websites can significantly boost their site speeds. Efforts like optimizing images, enabling compression, caching assets, and modernizing to HTTP/2 and HTTP/3 go a long way in reducing page load times.
While speed improvements require diligence and regular testing, the payoff can be well worth the investment - faster sites lead to happier users, lower bounce rates, better conversions, and higher organic search rankings.
By following the strategies and best practices covered in this guide, any website can embark on a journey of continuous speed enhancements to reap substantial business benefits. The faster your site, the brighter your digital presence and future.


Comments